This post includes a guide to add contact form and contact page in Blogger. Using this guide you can learn Blogger contact form gadget use, Google forms use in Blogger, process to create contact page.
More on this, post sections also explain how you can read contact requests, which are submitted by your site users.
How to Add Contact Form and Contact Page in Blogger?
There are two simple ways available to add contact form in Blogger. First is add Blogger contact form gadget in sidebar or in header or footer. Second is add Google Form embed code in blog different areas or in contact page.
Next, you can create a Blogger contact page by following given simple steps. After this, you can add Google Form in contact page by adding embed code in page.
Or, add Blogger contact form gadget on contact page by adding given code. Here, to make gadget code work on the contact page, you need to add a contact gadget in the sidebar. After that, you can hide contact form gadget, if you want.
Let’s start with contact form,
How to add contact form in Blogger?
You can add contact form in Blogger multiple ways. Here are two quick ways for you. These both ways are supported and offered by Google.
1. Blogger contact form gadget
Contact form gadget is the default available gadget in Blogger. You can add this gadget in the blog’s gadgets (widgets) area.
Process to add this contact form gadget in blog is simple as other gadgets. Following are complete steps to add contact form gadget in Blogger.
- Open Blogger dashboard.
- Open Layout settings from right bar options.
- Click the “Add a Gadget” option where you want to add form.
- Scroll down gadgets list and choose “Contact form” gadget.
- Click “Save” in Configure Contact Form Widget screen.
- Click save icon image in Layout settings.
Note: this contact form gadget can be added based on your blogger theme layout. It means, you can add this gadget where “Add a Gadget” option is available in the layout setting. For example in the sidebar, in header and in footer area.
Which contact detail fields are available in Blogger contact form gadget?
In Blogger default contact for gadget, you will get Name, Email and Message details in contact request. Here, Email and Message detail is mandatory to make contact requests.
How to read and respond to Blogger contact form gadget requests?
Blogger contact form gadget is default gadget in Blogger. So, you will get an easy process for reading and responding to contact requests.
When users make contact requests from Blogger contact request form, the process will send mail with form detail to your Blogger email. Now, you can read and respond to this email from your Gmail.
Can i add extra form fields in Blogger contact form gadget?
No, Blogger contact form provides fixed format form design (Name, Email and Message). You can not modify or add extra form fields in Blogger contact form. Here, you can only change the gadget’s title.
Now, to solve Blogger contact form gadget fixed fields issue, you can try Google Forms solution, which is explained in the next section.
2. Create and embed Google Forms
Google Form is another solution to add contact form in Blogger blog. This Google (Docs) service provides options to create forms with different fields and embed on web platforms.
Following are steps to create contact form in Google Forms and embed in Blogger blog.
- Open Google Forms (Login with Blogger profile email).
- Create contact form using Blank or Contact Information template.
- Add and modify contact form fields.
- Click the “Send” button and copy “Embed HTML” code.
- Open Blogger contact page in edit mode.
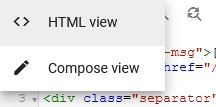
- Set page editor mode as “HTML view”.
- Paste embed code on the page or HTML gadget and click the “Update” button.
- Confirm process by submit form as normal user from contact page.
How to read contact requests which are created from Google Forms?
Google Forms in Google docs is a service to create questions and get responses.
To read contact requests which are created from an embedded Google Form, you need to open Google Forms. Here, open form which is embedded in your blog. Now, in the form detail view, you can read all your contact requests from the “Responses” tab.
Next, let’s check out the Blogger contact page guide.
How to create a contact page in Blogger?
Process to create a contact page is the same as creating a normal page in Blogger.
To create a contact page in Blogger, first follow create page in Blogger steps. Here, the page title is “Contact” or “Contact Us”.
Next, in the contact page, you need to add site related contact information. These details include, your sites contact email, social pages link (if available), contact form and contact page message.
How to add contact form gadget in Blogger contact page?
Blogger does not allow to add contact form gadget directly to contact page content, because Blogger page editor does not support gadget as content.
But, the Blogger page editor supports HTML code. So, to add contact form in contact page, you can copy form HTML code from console and add in page.
Following are steps to add a contact form in the Blogger contact page.
- Copy contact form HTML code. (Code given after steps)
- Open contact page in edit mode.
- Set page editor mode as “HTML view”.
- Paste code on the page and click the “Update” button.
- Confirm process by submit form as normal user from contact page.
Blogger contact form gadget HTML code for contact page
Following is Blogger contact form gadget HTML. This HTML will display contact form in contact page, if you add this code in contact page.
<div class="widget ContactForm _pageContactForm" data-version="2" id="ContactForm1" style="">
<h3 class="title">
Contact form
</h3>
<div class="contact-form-widget">
<div class="form">
<form name="contact-form">
<p></p>
Name
<br>
<input class="contact-form-name" id="ContactForm1_contact-form-name" name="name" size="30" type="text" value="">
<p></p>
Email
<span style="font-weight: bolder;">*</span>
<br>
<input class="contact-form-email" id="ContactForm1_contact-form-email" name="email" size="30" type="text" value="">
<p></p>
Message
<span style="font-weight: bolder;">*</span>
<br>
<textarea class="contact-form-email-message" cols="25" id="ContactForm1_contact-form-email-message" name="email-message" rows="5"></textarea>
<p></p>
<input class="contact-form-button contact-form-button-submit" id="ContactForm1_contact-form-submit" type="button" value="Send">
<p></p>
<div style="text-align: center; max-width: 222px; width: 100%">
<p class="contact-form-error-message" id="ContactForm1_contact-form-error-message"></p>
<p class="contact-form-success-message" id="ContactForm1_contact-form-success-message"></p>
</div>
</form>
</div>
</div>
</div>
Next, suppose you add contact form in the blog/site sidebar or in another area and also add form in contact page. In this case two contact forms displayed on the contact page. Now, to solve this issue, check out the following answer.
How to hide contact form gadget in Blogger?
By setting contact form container element CSS “display” property “none”, you can hide contact form in Blogger.
Following are steps to hide contact form in Blogger using CSS.
- Copy following CSS code.
- CSS code: #ContactForm1:not(._pageContactForm){display:none;}
- Add this code in the Blogger custom CSS setting.
Here, “#ContactForm1” is the id of your contact form gadget container. By adding it’s display property none, you will hide the entire contact form. And, “:not(._pageContactForm)” will helps to stop hiding page contact form.
Note: if above CSS code does not work for you, then you need to check your form container id by using browser inspect element option. But, in most cases above id exists for first contact form gadget.
At Last,
Hope you found a guide helpful to add contact form and contact page in the Blogger.