Google AdSense setup and ad placements: get info for AdSense ads.txt, seller.json file, CCPA message, auto ads, create ad units and best ads placement.
If you are a beginner for AdSense or your new blog/site approved for AdSense ads, then this page is for you to get info for basic Google AdSense setup and best ad unit placements.
Things included in this post: Required actions for ads.txt, sellers.json and CCPA messages. Ad setup best practices for auto ads, ad unit and global settings. AdSense ads best placement tips with detail. Best free WordPress plugin for ads placement. At last, FAQs for Google AdSense ads tips, settings and things to take care.
Let’s start checking all Google AdSense setup and ad placement details one by one. If your AdSense account has just been approved, then the following guide will help you a lot.
Fix AdSense Ads.txt file issues
When you open your AdSense account dashboard and find a message, which says that “You need to fix some ads.txt issues …”, then you can follow following steps to fix this issues.
- Click the “Fix now” option from message.
- Now, Click down arrow and open “Add your publisher ID to these ads.txt files” message.
- Copy your publisher ID: in message you will find publisher ID like following example, [
google.com, pub-0000000000000000, DIRECT, f08b47ftc0942fk0], copy that line. - Create ads.txt file or add entry for existing file.
- WordPress: if ads.txt file does not exist on your domain root, then create it and add “publisher ID entry” in file. If the site already has an ads.txt file, then add a new entry in that file. For WordPress you can manage an ads.txt file from a hosting dashboard or using WordPress ads.txt plugins.
- Blogger: if your blog is running on blogger, then “Enable custom ads.txt” setting from “Settings > Monetization” and add publisher ID entry to custom ads.txt input.
- Check and confirm publisher ID change in your sites ads.txt file by visiting your site’s ads.txt. Example url:
https://yoursitename.com/ads.txt.
Required action completed from your side, once you complete the above process. Now, the AdSense system takes up to 24 hours to reflect the changes. After that “You need to fix some ads.txt issues …” message will disappear from your AdSense dashboard.
Google AdSense sellers.json setup
Google AdSense sellers.json setup is not mandatory. It is suggested change by AdSense to make your seller information transparent.
Seller.json message:
We encourage you to publish your seller information in the Google sellers.json file. Visit the account settings page to review your current visibility status.
Following are steps to set up sellers.json change in AdSense.
- From seller.json message, Click on the “Action” option.
- It will open an “Account Information” page.
- Go to the “Seller information visibility” setting.
- Set visibility status “Transparent”.
- For “Business domain“, set your business site domain name. For Blogger, you can set your main blog’s domain name. This is optional detail.
- Change will save automatically, when you change it.
That’s it. Now, once your seller information is updated on Google seller.json file, this seller.json message will be removed from your AdSense dashboard.
Note: this change takes more time, maybe more than weeks.
What if I do not want to share seller information? It’s fine; this is suggested change by AdSense. If you do not want to take any action for this message, then just click the “Dismiss” option in the message to remove it from the dashboard.
If you are still confused about this setting, then you can get more information on the related AdSense Help page.
AdSense CCPA privacy message settings
AdSense CCPA settings message is related to restricted data processing for your site’s California users.
You can make related settings by clicking on the “Take Action” option in the message. This “Take Action” option opens the “Restricted data processing” setting page. Now, you need to select one option from the following two options.
Don’t restrict data processing: If you choose this option, AdSense will show personalized ads to your site’s California users. With this option you need to set up a CCPA privacy message for your site.
For more detail regarding this options and privacy message setup, you need learn more from this AdSense Help page.
Restrict data processing: If you choose this option, Google will show only non-personalized ads to your site’s California users. For this option, you do not require any more changes.
If you are a beginner for AdSense, then this option is suggested. You can try other options, once you get enough idea about this process.
AdSense ads setup
AdSense ads setup is simple. If you are beginner and want to setup ads in your site, then following step by step guide helps for best setup. You will get information for auto ads, manual ads, ad unit types and global settings.
How to setup AdSense auto ads?
Auto ads setup and customization for sites is simple. Auto ads feature is a quick way to show AdSense ads within hours and start earning.
Steps to setup and customize auto ads:
- Sign in to Google AdSense.
- Open “Ads > Overview” from sidebar options.
- Click “Edit pencil icon” for the site from “All your sites list”.
- This option opens the “Ad Settings Preview” page site.
- Enable “Auto ads” from Add settings.
- Now, enable all “Ad formats”.
- Set “Ad load” (Number of in article ads).
- Manage “Page exclusions” if you don’t want to show ads in some pages.
- Click the “Apply to site” button to save your changes.
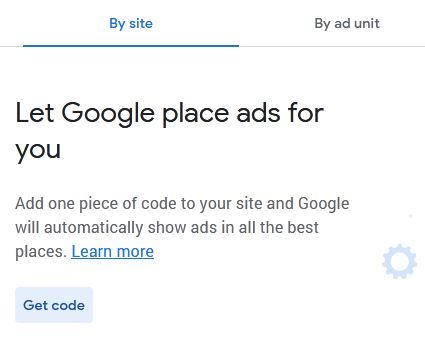
Is any script code required for showing auto ads? No special code required for auto ads. Make sure you properly added AdSense code in your site. You can check this code from “Ads > Overview > By site” and “Get code” option.
If this code already exists on your site, then no more action required for AdSense auto ads setup.
How to setup AdSense by manual ad unit?
AdSense setup by manual ad units gives more freedom for ad placement. You can create the required ad unit and add its code to the desired place to show the ad.
Following are available types of ad units, which you can try in the manual ad unit process.
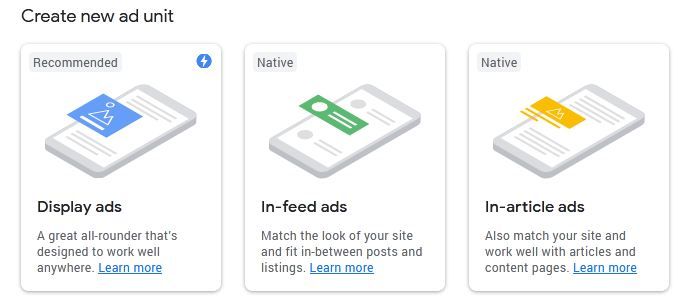
- Display ads: General ad unit, which can work in any place. You can select its size (responsive/fixed) based on your requirement.
- In-feed ads: This is listing ads. You can display this unit between your listing. In-feed ad units have font and other settings to create matched ads with your listing.
- In-article ads: In article ads create more chances to generate clicks. It shows in between content. This ad unit has a list of options to give an ad related look to your content.
Steps to create and use manual AdSense ad unit:
- Open “Create new ad unit” from “Ads > Overview > By ad unit”.
- Select type of ad unit.
- Give name to your ad unit (try to mention ad unit type and position in name).
- Set ad unit properties (font, size etc.,) as per requirement.
- Check ad unit preview and click the “create” button.
- Now, Get ad unit code and paste it in your site where you want to display it.
What is the Global settings tab in AdSense Ads?
This tab has common settings for all of your sites. This tab has an option for “Ad size”. You can enable or disable mobile ads size optimize setting from this tab. In size optimization, Google AdSense will choose the best mobile ad sizes for your site.
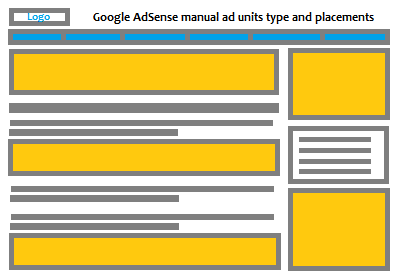
What are the best AdSense ads placements for more revenue?
There are 6 (six) best AdSense ads placements for more revenue. Following is a list of placements. For Google AdSense setup and earnings ad unit placements plays important role.
- Before content and after the main menu. [Display ad]
- First widget in sidebar. [Display ad]
- Third widget in sidebar. [Display ad]
- After the first paragraph. [In-article ad]
- After the third paragraph. [In-article ad]
- In-feed ad after the second result in listing. [In-feed ad]
Above ads placements have high view ability and more chance to get user attention. You can check ads placement’s visual position in the following image.
TIP: If AdSense auto ads do not display ads in these places, then create these six ad units from AdSense and set manually in your site.
How to use AdSense auto ads and manual ad units together?
AdSense auto ads work great but it does not work 100% for all sites. So, for more AdSense earnings, combination of auto ads and manual ad units is great practice.
Following are simple step by step processes to use auto ads and manual ad units together for more earning.
- Setup AdSense auto ads for your site.
- Create manual ad units for best ad placements and set ad units code on site.
- Now, auto ads identify existing manual ad units and show more ads within number of ad limit.
- Analyze earning results for 1-2 weeks and change manual ad unit placement if required.
By applying above combination and ad placements practice, you can stop auto ads from displaying ads in useless positions.
TIP: If your site is running on WordPress, then “Ad Inserter – Ad Manager & AdSense Ads” is the best plugin for setting manual ads in best positions.
FAQs for AdSense setup
Following are quick FAQs for AdSense beginner users. You will find a detailed AdSense setup process in the above sections. Here, you will get answers for questions which are related to AdSense use and earnings.
How to stop showing auto ads from particular site areas?
Disable auto ads for selected pages is possible. But, if you want to stop showing auto ads in some sections of the page, then there are no settings available in AdSense for this.
For example, auto ads showing 3 ads in footer and you not want to show too many ads in footer. In this case, you can try a manual ads unit.
For solution, create 6-7 manual ad units for best ad placements and add in site. By this, you make sure about high earning ad positions. Also, once you add manual ads, auto ads have limited units to display, so it does not show too many ads in useless positions.
How many AdSense ads can you have per page?
Number of AdSense ads per page depends on content size and site design. Now, publishers can show more than 3 ads on a page. If we check auto ads, it will show 7-8 ads based on content.
So, you can show more ads based on content size. Also, here try to follow practices that never show more than 3 ads in active view-port. It means, place ads in such a way that maximum three ads show to users at a time. When the user scrolls down or up the page, then you can display more ads.
Which are better AdSense Auto ads or Manual ads?
Manual ads are better, if you know high conversation ad placement. But, practically it required too many try and errors. So, use of both Auto ads and manual ads is best practice for more earnings.
Hope, you found Google AdSense setup and ad placements information helpful. If you have queries or suggestions for AdSense setup, then you can ask or share it in the comment section.